High-quality product photos positively impact customer visits, online sales, and brand visibility. Photo editing best practices, adoption of latest tools and techniques and skilled resources are critical to ensuring enhanced visual appeal of your products.
Contents
Ecommerce marketplace Etsy suggests that 90% of online buyers rate product image quality as more important than product price. The role of visual appeal in increasing footfall and conversion is supported by multiple other industry research data points.
However, despite the criticality of image quality, online sellers face a host of challenges in getting the desired photo quality that entices customers. You can rarely achieve the desired look straight from the camera. Hence, the final product image quality invariably depends on the competence, expertise, experience, and technology skills of the product photo editor. Organizations’ photo editors should be involved in understanding how to edit photos to look professional, ensuring every detail is optimized. We share with you 13 product photo editing tips to enhance your store visibility and increase online sales.
How poor product photos affect sales
You might think your product photos are doing a fair job. But properly edited photos can shoot up your sales. On the other hand, poor-quality product images can take a heavy toll on your revenues and brand reputation.
Low-quality product images
Pull down chances of sales and affect brand image
- Signal the seller is not attentive to details and quality
- Create misgivings both about the product and after-sales service
- Affect trust and the reputation of authenticity
Misrepresent product attributes and affect marketing efforts
- Disengage buyers
- Misrepresent product attributes
- Can skip display of essential features that a buyer needs
- Hide the real look and feel of the product
- Create a perception gap between what was bought and what received
- Lead to more refunds, customer complaints and bad reviews
- Affect brand reputation and marketing outreach
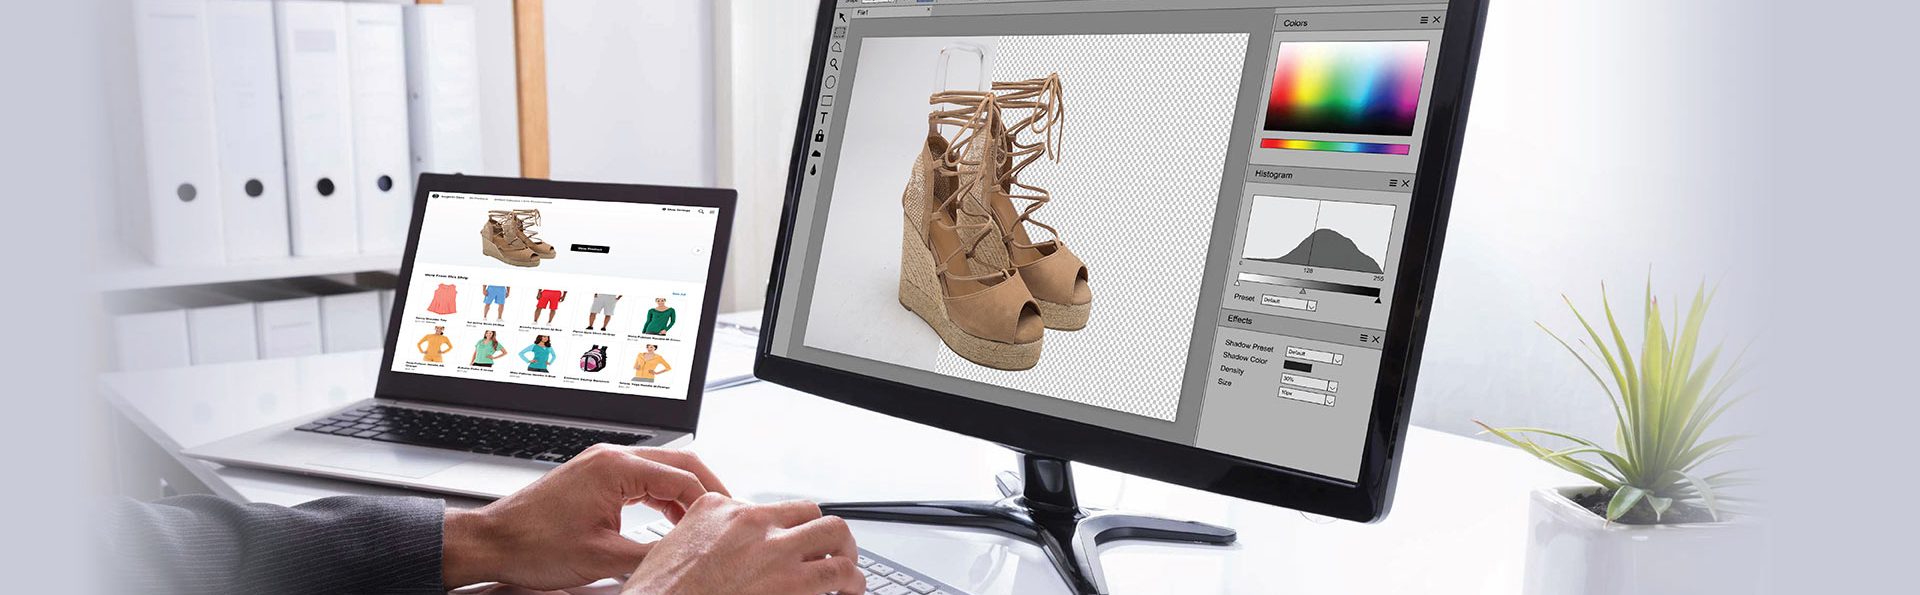
Find the use case: How high quality product photo editing strengthens a fashion store’s brand
Top 13 product photo editing tips to make professional looking photos
Product photo editing ensures that your products are rendered in the best light. For those who are wondering how to make pictures look more professional, here are some useful tips.
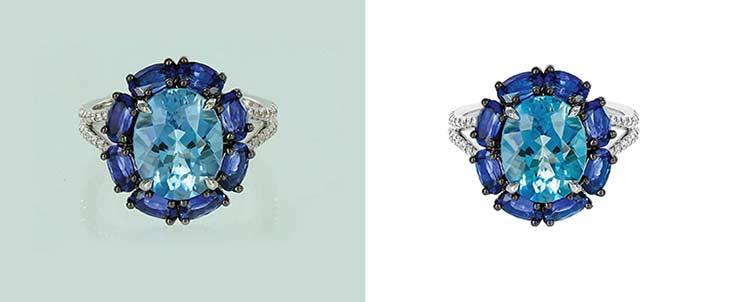
1. Enhance colors to make products look natural

In some product photos, the colors may get affected due to background, lighting, or any other reason. For instance, a blue wallet can reflect blue light and change the background tone. Other elements, like zippers and buttons, can also look different when in shade. This requires color correction to make the photos look natural.
Photos may not look aligned with natural colors despite studio lighting and camera framing. To enhance colors, experts balance the vibrance and dim the effect produced by shiny surfaces. They also eliminate washed-out colors so that the product image looks natural and attractive.
Product photo editors usually apply Photoshop’s basic color correction features to nail the desired color when working at speed. However, certain photos may require greater attention and application of extra filters. When correcting colors, you need to avoid extreme manipulations and focus on saturation and hue slider tweaks. You can use multi-clipping paths to enhance, amend, or change the color exposure.
2. Improve composition and perspective to present the product accurately

The composition of the images should highlight all main product features. Using photo editing tools, the editor should place the subject centrally, eliminating distracting elements from the background. With photography techniques like the rule of thirds, editors can compose the images based on the intended message.
To get the right composition, crop the image to exclude unimportant portions and artifacts. You can use Smart Guides, in Adobe Photoshop, to correct pictures based on guidelines and thus ensure consistency.
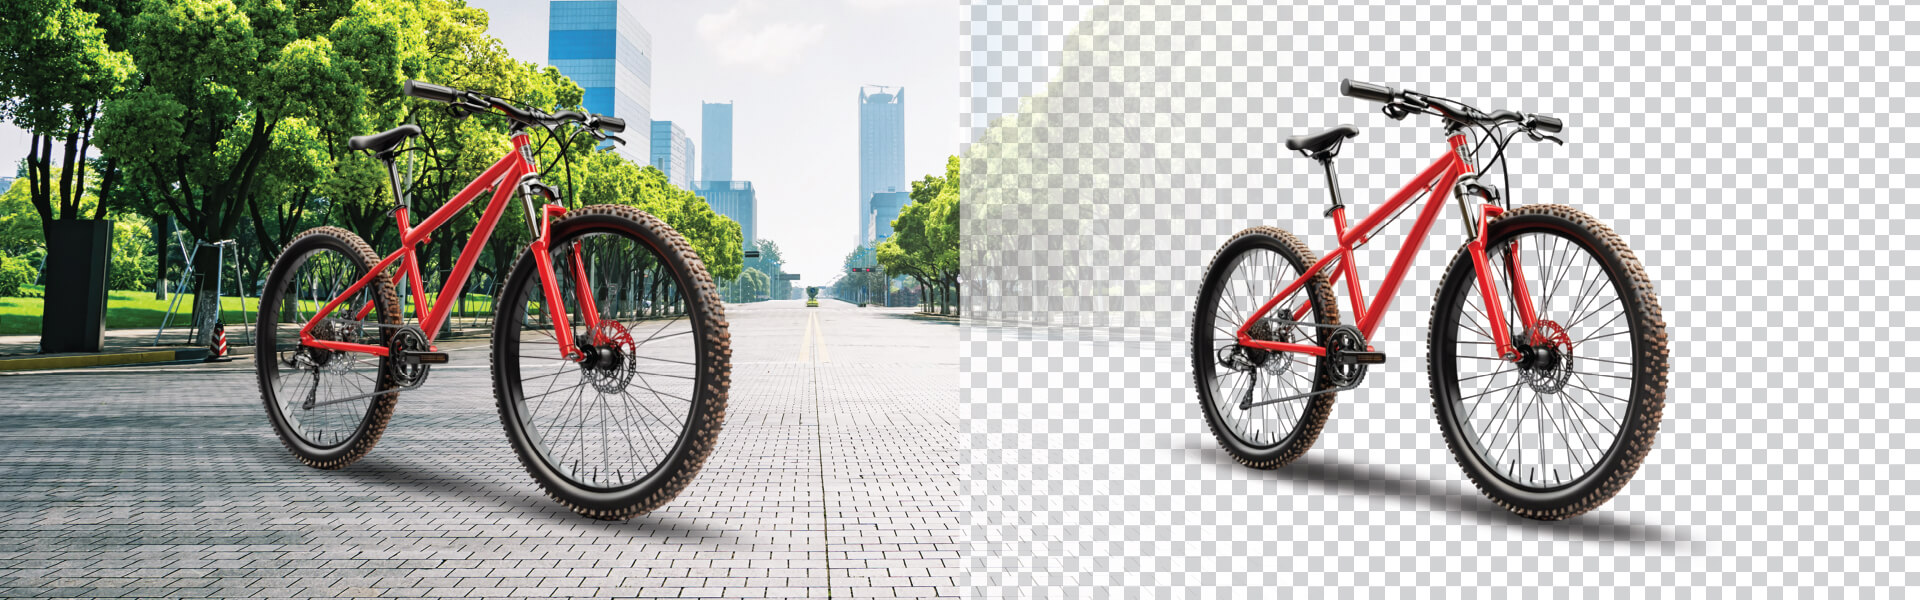
3. Remove unwanted items from the background to make buyers focus on the product

Photo backgrounds may be littered with unnecessary elements. You need to remove these from the background to focus on the product itself. The background can be made transparent or blurred to highlight the product. It can also be replaced with a color that boosts the product’s colors, reflection, style, and beauty.
You can also use content-aware cropping to preserve essential elements in an image. Masking and selection tools help to remove the background smoothly. When done right, cleaning up the background can help a product stand out and catch the eyes of buyers.
4. Use natural light to add a real feel to product photos

The sun’s position affects natural light conditions. After a photo has been captured, it is challenging to fix natural light, especially if the brightness is too low. Great natural lighting is essential to make images stand out. Editors manipulate shadow effects created by natural light to focus interest on the product. Good natural lighting helps add a real feel to the product photos instead of making them seem fake.
Harsh sunlight can overexpose photos and change their color, appearance too. So, it makes sense to soften the light with photo editing tools. The light can be softened during the editing process by adjusting the sliders for saturation, brightness, and contrast.
5. Sharpen images to ready product photos for online campaigns
Emphasize the texture of the image, identifying edges and any contrast issues that could reduce the image quality. By altering the contrast, the images are made sharper and become good for online campaigns. But one must take care not to go overboard with sharpening, contrast level, radius, and the threshold of sharpening for similar colors.
People also read: How perfect product photo editing helps boost sales
6. Remove grains to add clarity and vibrancy to product photos
Noise is a term used to indicate millions of hazy grains that drastically impact an image’s clarity. If photos carry unwanted noise, they are unfit for online use. Photographers working in low-light settings usually face this issue. To overcome this, you need to balance pixel density and improve the “grainy” pictures, adding clarity, vibrance, and appeal.
7. Remove mannequins to create the look of a 3-dimensional space
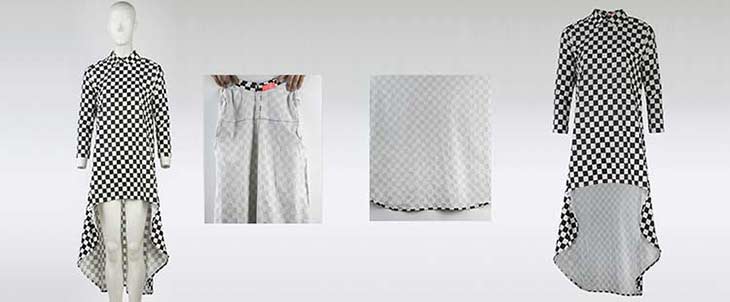
Use ghost mannequins to edit product photos. In an ideal photo editing process, editors remove the mannequin from the photos, creating the look of a 3-dimensional space. This makes the photo look professional, and without the mannequins, the focus remains on the product.
This technique involves shooting photos of garments put on mannequins. The mannequin is removed from the image during editing. You need to select the mannequin in the image, reverse the selection by choosing the item of clothing while removing the background, and then do contextual background fill. This technique is applicable for 360-degree photo-editing too.
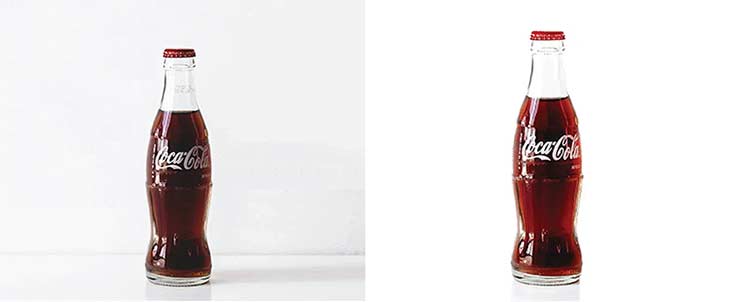
8. Remove reflection or glares to emphasize natural curves and outer lines of a product
Most pictures of shiny and reflective products have glares. You need to change the pictures by deleting these reflections. While working with reflections, identify the reflections essential to feature the main product while removing others.
You can remove undesirable reflections using color blending. Sample a color from a neutral color spot and put neutral colors on the reflection with a color blending brush. The Sponge Tool in Photoshop effectively removes reflections from metal surfaces that already have neutral colors. This way, you can simply desaturate the target spot.
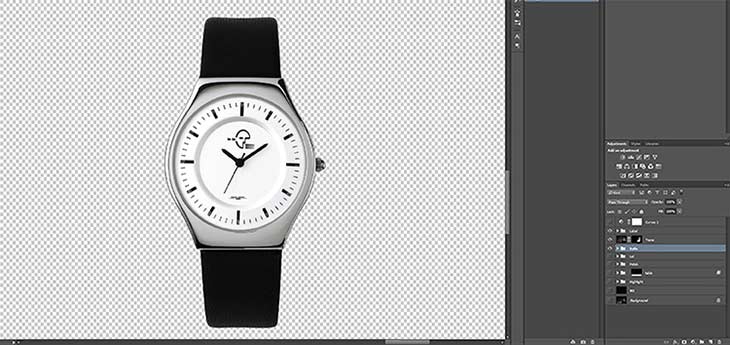
9. Adjust tone, brightness, and contrast for increased depth and appeal
Tone and color adjustments are critical for setting the lighting mood of the product image. These adjustments add depth to the photos and increase their appeal. Editors ensure that the white balance factor is considered in varying light conditions, representing the whites well.
Use the Contrast feature to ensure that the product image looks more distinct, with sufficient exposure. The Curves Tool helps to strike the right color balance. Ensure a neutral histogram and do quick color correction using mid-tones or using curves and the info palette. Repeat shadows and mid-tones after choosing a sample point and correct the color cast on the curves graph. Then remove the samples and save.
10. Apply HDR to display highlights and shadows effectively
Use high dynamic range (HDR) attributes to product images for a higher range of luminosity, using the original photo in different bracketed images. Then merge the bracketed photos into one so that the resulting photo showcases highlights and shadows effectively. HDR helps in rendering images with better contrast too.
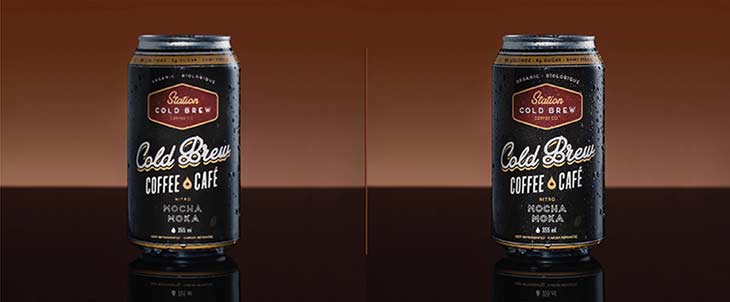
11. Add shadow and mirror effect to make products look multi-dimensional
Realistic and consistent shadows make images stand out and feel natural. There are two kinds of shadow effects in product photos: one that darkens the presentation and the other that is usually cast by the product itself. You should eliminate the former type of shadow since it distracts attention from the product and even conceals its attributes.
The shadow cast by a product provides realistic image depth and impresses customers. You need to use reflection and drop shadows to make the products look multi-dimensional and highlight product details, along with their 3D geometry, better.
You also must consider editing product photos with a mirror effect. For example, fashion accessories like sunglasses look dramatic with reflections and shadows. But a mirror effect is out of place; it reflects on photographic equipment in the same frame along with inessential items that distract from the main product. These need to be removed.
12. Remove/soften wrinkles to make products look perfect
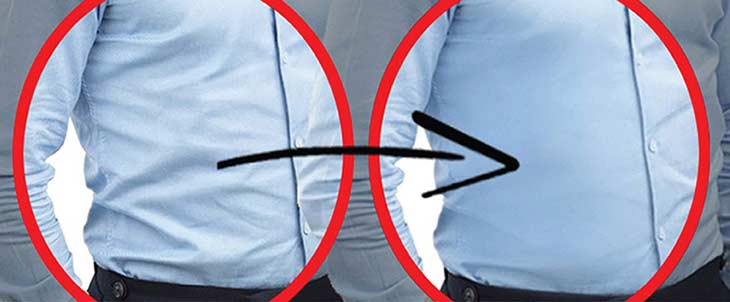
Product photos of clothes normally look perfect in online store images. Editors ensure that the clothes are without wrinkles and creases. You need to eliminate wrinkles that could spoil the beauty of a dress.
For this, use the spot healing brush, clone tool, patch tool, or the healing brush in Photoshop. Set the spot healing brush to ‘content aware’ and change the mode of the brush from normal to ‘replace’. Then, using a soft edge, paint along the wrinkles and over them to ensure they are removed. You can also use Frequency Separation to remove wrinkles with Gaussian blur.
13. Remove props to highlight the product photo
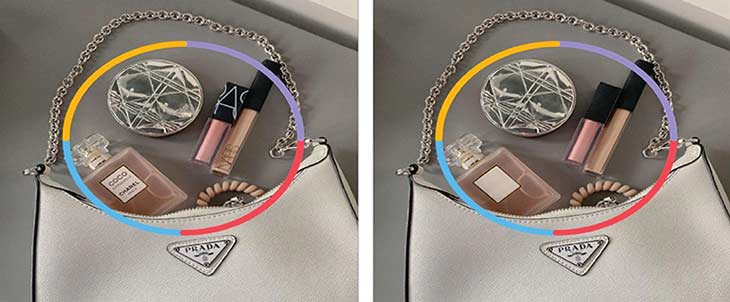
When editing product photos with Photoshop, especially dresses, you need to remove styling props that keep the dress in place. These props usually include pins, hangers, bag hangers, or mannequins. Ecommerce sites eliminate these props from photos with retouching techniques, ensuring no unnecessary elements dampen the dress’s image appealed.
Product photo editing in the future
With the emergence of artificial intelligence, product photo editing is expected to evolve. AI-based image editing apps are already quite a rage. Eliminating backgrounds and implementing edits is becoming easier with the lower processing time involved today.
Capabilities of AI enabled photo editing tools include:
1. Automated elimination of backgrounds
The pixel-tracing chores are now automated thanks to tools featuring AI capabilities, making the editing process fast and simple. Editors can now leverage artificial intelligence to automate tasks related to pixel tracing to ensure quick edits as per specifications.
2. Automated ecommerce photo editing workflows
Editors now benefit from computer vision and deep learning tools for object detection and boundary identification. They use AI-driven workflows and cloud-based image processing to ensure quick image detection, light corrections, and subject enhancement.
3. 3D rendering of 2D images
AI-based photo editing tools are improving at correcting photography mistakes and can render 3D images out of flat 2D images with added perspective and shadows. They can fill in natural-looking lighting, remove backgrounds, add a perfect bokeh (background blur) effect and even drive animations with a string of photos.
Also, a new trend of using “floating products” adds playfulness and liveliness to the images, as smart editing techniques make them appear suspended over surfaces.
4. AI-based image enlargement
Ai-based image enlargement is already in use with multiple tools in the market offering enlargement up to 8k resolution. They have become a standard part of a photo editor’s arsenal for graceful enlargement of photos.
5. Quick image selection with AI
AI-based tools help you select the best product images, and thus, help to avoid human error and bias in choosing the right photo to showcase your product. Ai-based image selection also helps photo editors to choose the best photo to touch up and spend their time on.
AI can do many things that a human photo editor does, including adjusting colors and exposure, automatic masking, replacement of skies, etc. But it still works on past samples and cannot come up with truly creative solutions. Current role of AI is limited to accurately conducting simple and repetitive tasks. In the future, AI and automation will have a greater role to play in photo editing and batch photo editing.
HabileData – The perfect outsourcing partner for product photo editing services
HabileData provides professional photo editing services for ecommerce companies that value exceptional quality images for product promotion. HabileData’s team of photo editors deliver advanced image editing, perfect balance in brightness and contrast, elimination of scratches, wrinkles, and spots and highlighting of product features. They also implement feature correction with tools like Adobe Lightroom and Photoshop.
HabileData uses robust workflows for image enhancement, ensuring that marketing campaigns are properly backed with high-quality images. Hitech offers multiple file-sharing options, file formats, and conversions to satisfy clients worldwide.
Conclusion
Online consumers do not have the opportunity to touch, smell or taste a product before purchase. So, without good photos, their understanding of what they are buying comes down to dry text descriptions which they may or may not comprehend well. And photos become the biggest factor in making the offer engaging.
First impressions count most in enticing buyers to make prompt purchases. So, every product photo should be of high quality. Without good product photos, a buyer wouldn’t even consider a purchase. But with the photo editing tips in this article, you can create images that can nudge the customer into buying your products.
FAQs
To make your images look professional, you must master consistent editing and high-quality retouching. Focus on neutralizing the background, ensuring color accuracy, and adding realistic drop shadows for depth. If managing high volumes becomes a bottleneck, our product photo editing services can help you maintain a premium, uniform look across your entire catalog.
Ensuring color accuracy is critical for reducing customer returns. You should use Photoshop’s color correction tools to adjust saturation and hue while neutralizing any color casts from studio lighting. For complex items like jewelry or apparel, utilizing multi-clipping paths allows for precise exposure adjustments, ensuring the digital image perfectly matches the physical product in your customer’s hands.
You can remove backgrounds cleanly by using the Pen Tool or clipping path services for surgical precision. While AI tools offer speed, manual image masking is essential for products with complex edges like fur or hair. A clean, white background eliminates distractions, ensuring that your buyers remain focused solely on the product’s key features and quality.
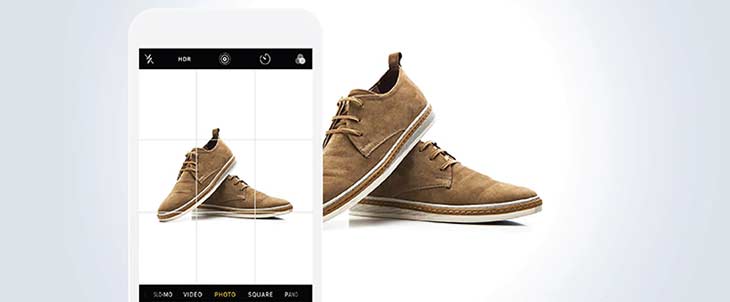
Yes, you can capture high-quality images with a smartphone, but the secret to a professional finish lies in the post-processing. Even mobile shots require adjustments to brightness, contrast, and sharpness to meet marketplace standards. Our expert editors can transform basic smartphone photos into high-conversion assets through advanced image enhancement techniques and expert retouching.
To make apparel look flawless, use the Spot Healing Brush or Frequency Separation in Photoshop to remove creases and lint. This process, often combined with the ghost mannequin technique, creates a clean, 3D effect that helps customers visualize the fit. Eliminating these distractions is a vital step in ecommerce solutions to build brand trust and perceived value.
Blurry photos often result from camera shake or low light, but you can enhance clarity during the sharpening phase of editing. By adjusting the Unsharp Mask settings – specifically the radius and threshold – you can emphasize textures and define edges. However, for the best results, always ensure your original shots are taken using a tripod to maintain maximum sharpness.
Edit eCommerce product photos to make them look professional.
Our photo editors deliver images that entice customers into buying your online products.
Get in Touch with our Experts »


Snehal Joshi , Head of Business Process Management at HabileData, leads a 500-member team of data professionals, having successfully delivered 500+ projects across B2B data aggregation, real estate, ecommerce, and manufacturing. His expertise spans data hygiene strategy, workflow automation, database management, and process optimization - making him a trusted voice on data quality and operational excellence for enterprises worldwide. 🔗Connect with Snehal on LinkedIn